Every home places a high value on wind chimes. It creates a cheerful atmosphere in the home with its tingling tones. It is thought to be one of the most typical house decorations and to be present in every single home.It will be more special if DIY it .
Step 1: Things Needed for Making DIY Wind Chime


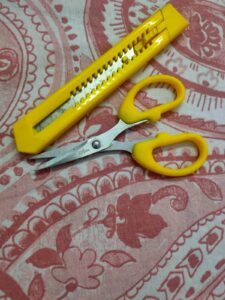
Step 2: Let’s cut the cans from above using scissors or paper cutter.
Now,we need cut the above portion of the cans . Please be careful while doing this as the edges are sharp.Do it with the help of elders.It will look like the picture below.

Step 3: Let’s Make A Hole in the can with the help of scissors.

Step 4: Let’s Make Hanging!
First attach the metal loops with the can. I’m using the metal connectors , you can use the thread or lace or what so ever fits.

Step 5: Connect All the cans to make a hanging.

Notice that i have used the cans openings in the botton and its sounds beautiful.

Step 5: Let’s Make Top Hanging!
I’m using old curtain loop to link all the cans.

Step 6: yay! It’s Ready
This beautiful wind chime will grab the attention of everyone. It is easy to make and looks really beautiful. You can use the cans or plastic bottles of your choice .You can paint the cans also to make it more beautiful.

PRO TIP
You can use this hanging planter also. Try this beautiful wind chime and share your feedback with us.


Mind-blowing
You actually make it seem so easy together with your presentation however I to find this matter to be really one
thing that I think I’d never understand. It kind of feels too complicated and extremely vast for me.
I am taking a look ahead for your subsequent publish,
I will attempt to get the hold of it!